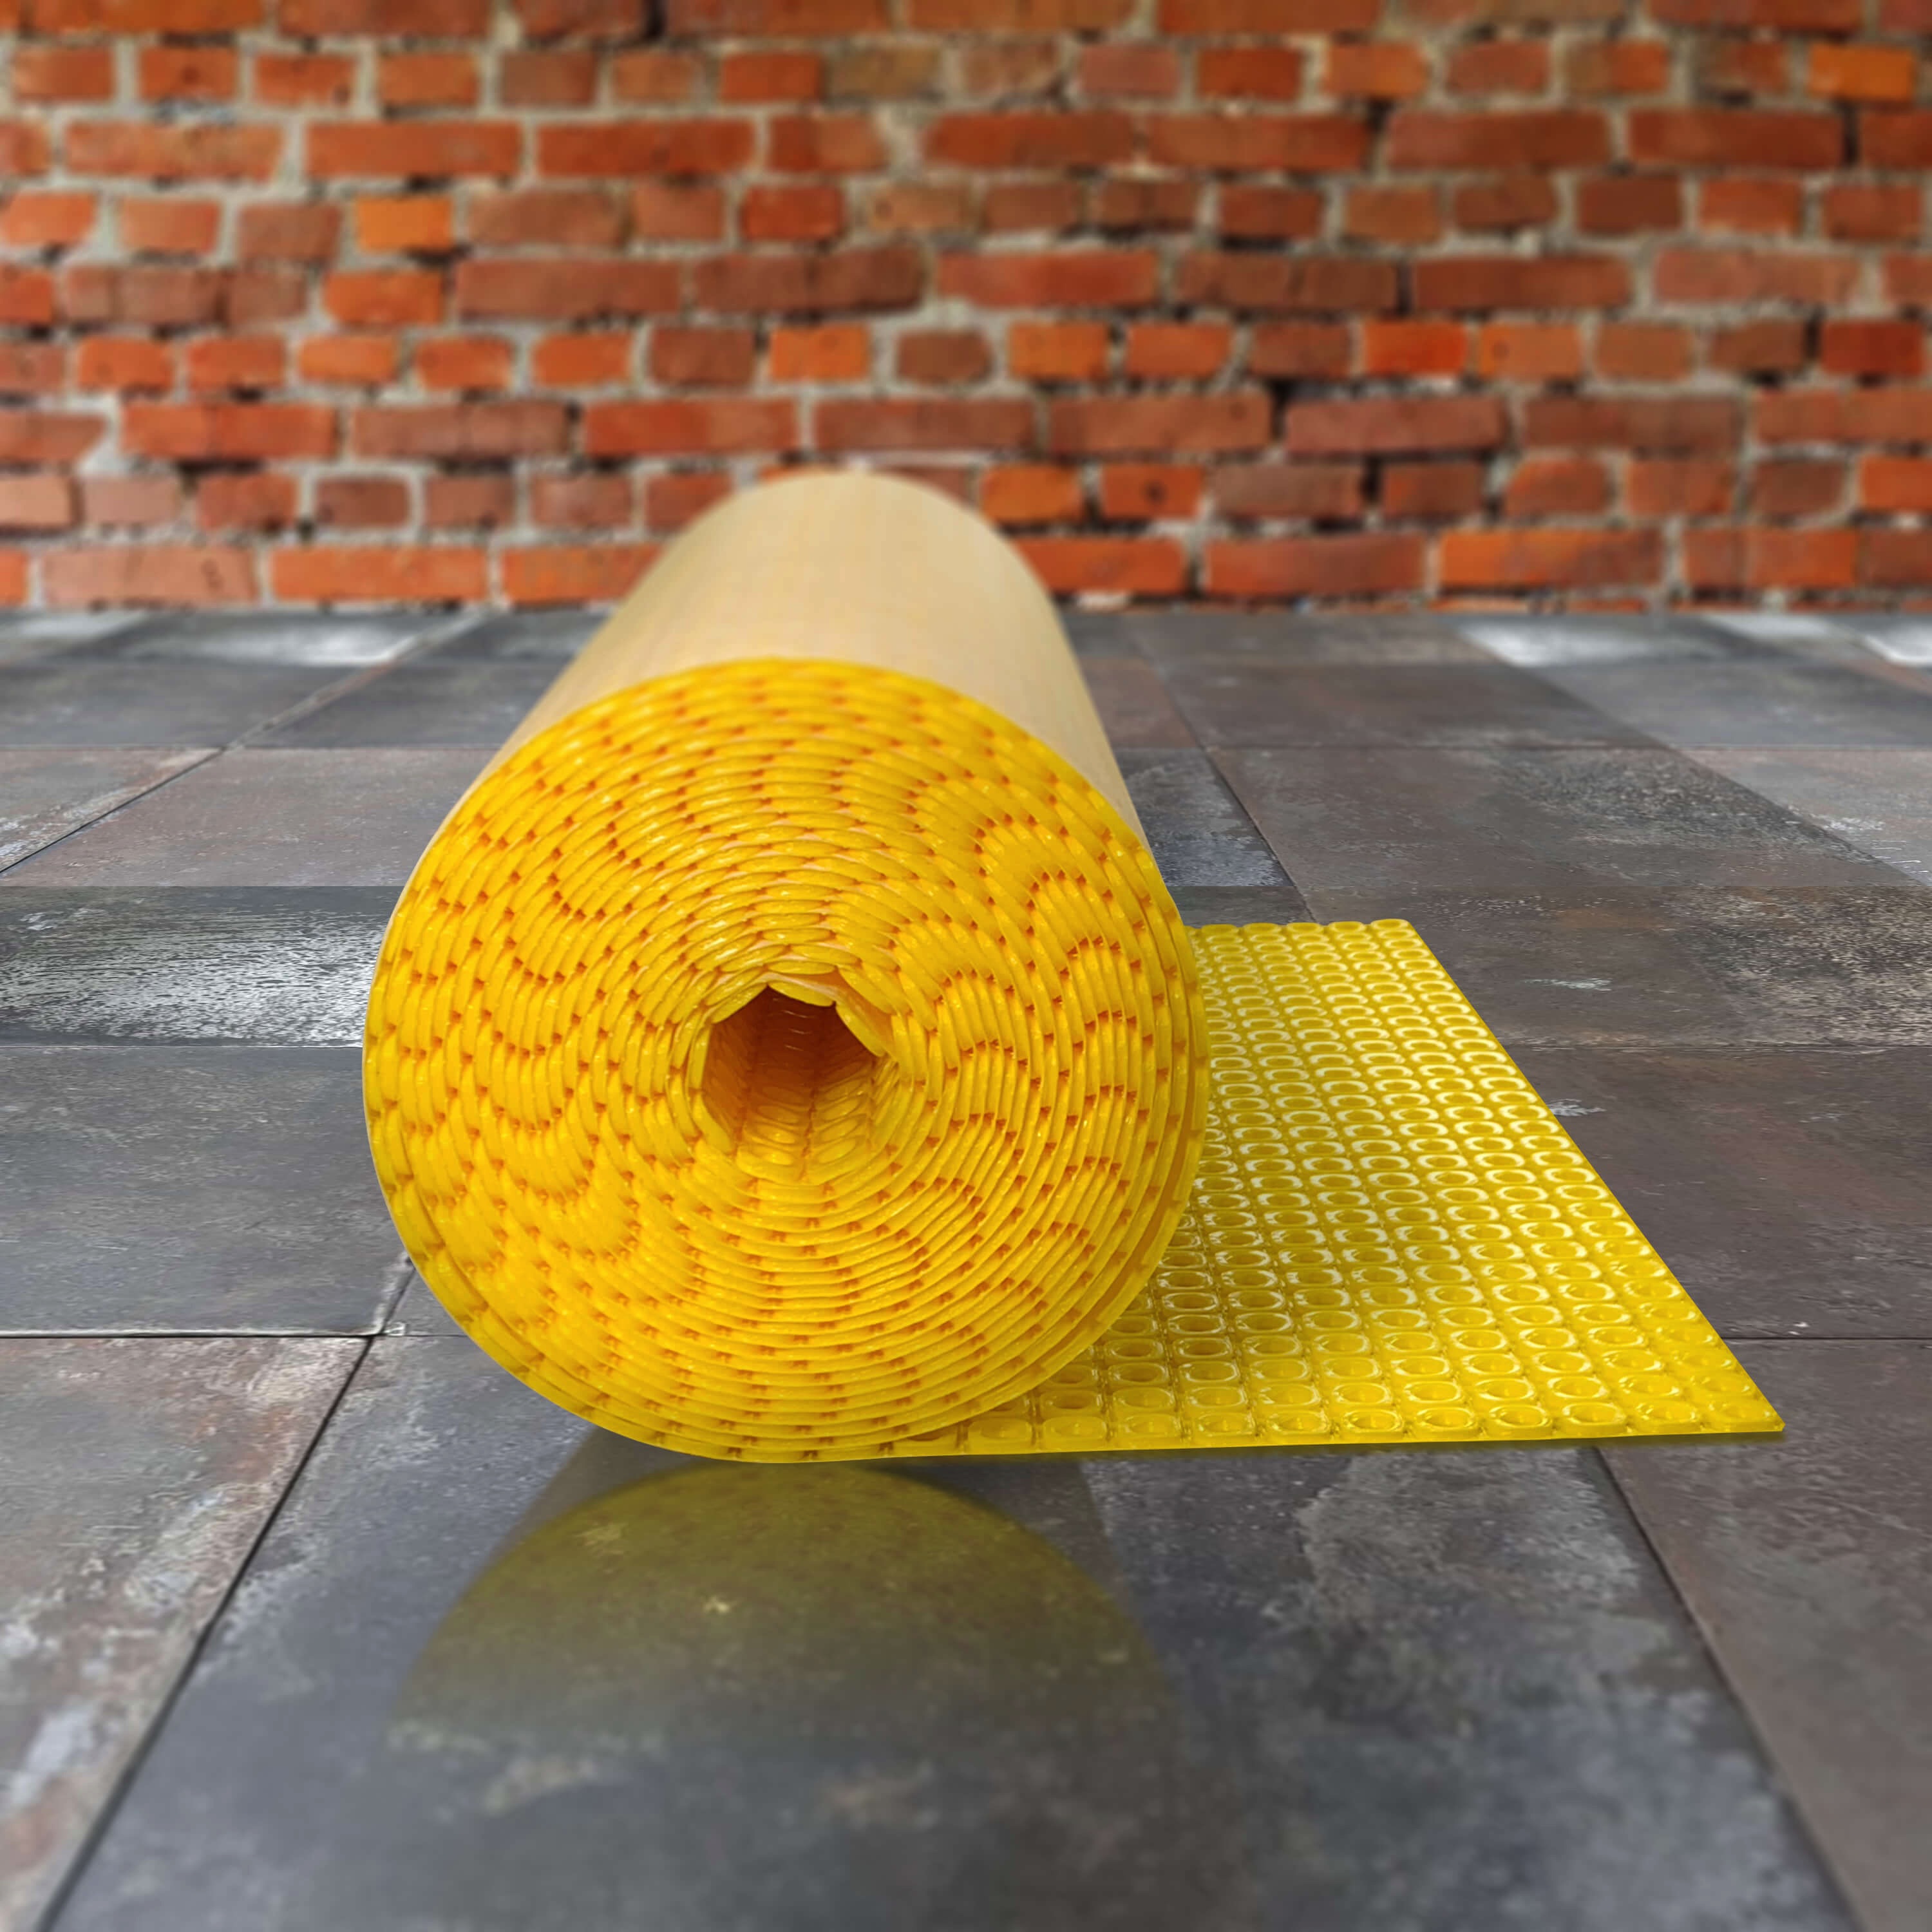
CI++ MATTING


In order to make fixing CI+ matting a simple and easy installation please follow our 5 point guide below.
OUR 5 POINT FIXING GUIDE
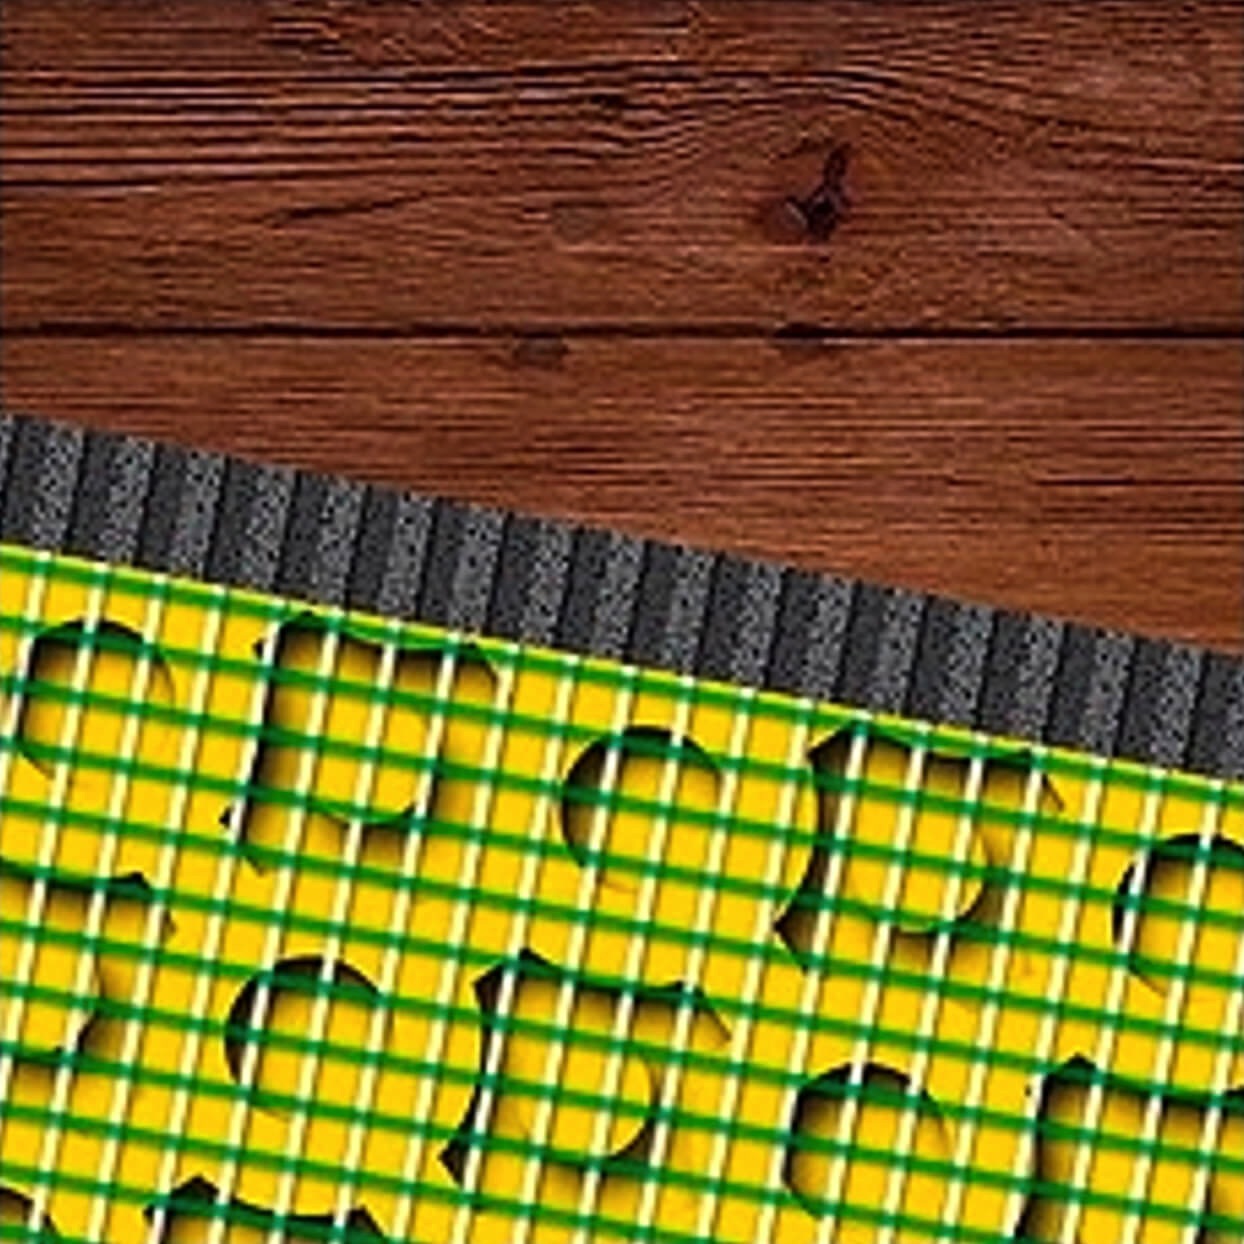
These supplementary instructions will ensure the successful use of CI++ matting on this common substrate. Due to the amount of movement involved please follow instructions carefully. 1. All floorboards must be free of flex and vertical movement. CI++ Matting can absorb horizontal stress, but not vertical movement. Mechanically fix any loose boards. If a stable surface is not possible, overlay the floorboards with a plywood covering. Installations vary, but a 12mm plus thick board gives sufficient stability for CI++ matting.
Preparation
2. Check for warping across the board width. This can cause failure in the bond between the underside of the matting and the substrate. If severe warping is present overlay the floorboards as above. A self-leveling compound can also be used.
Fixing the matting
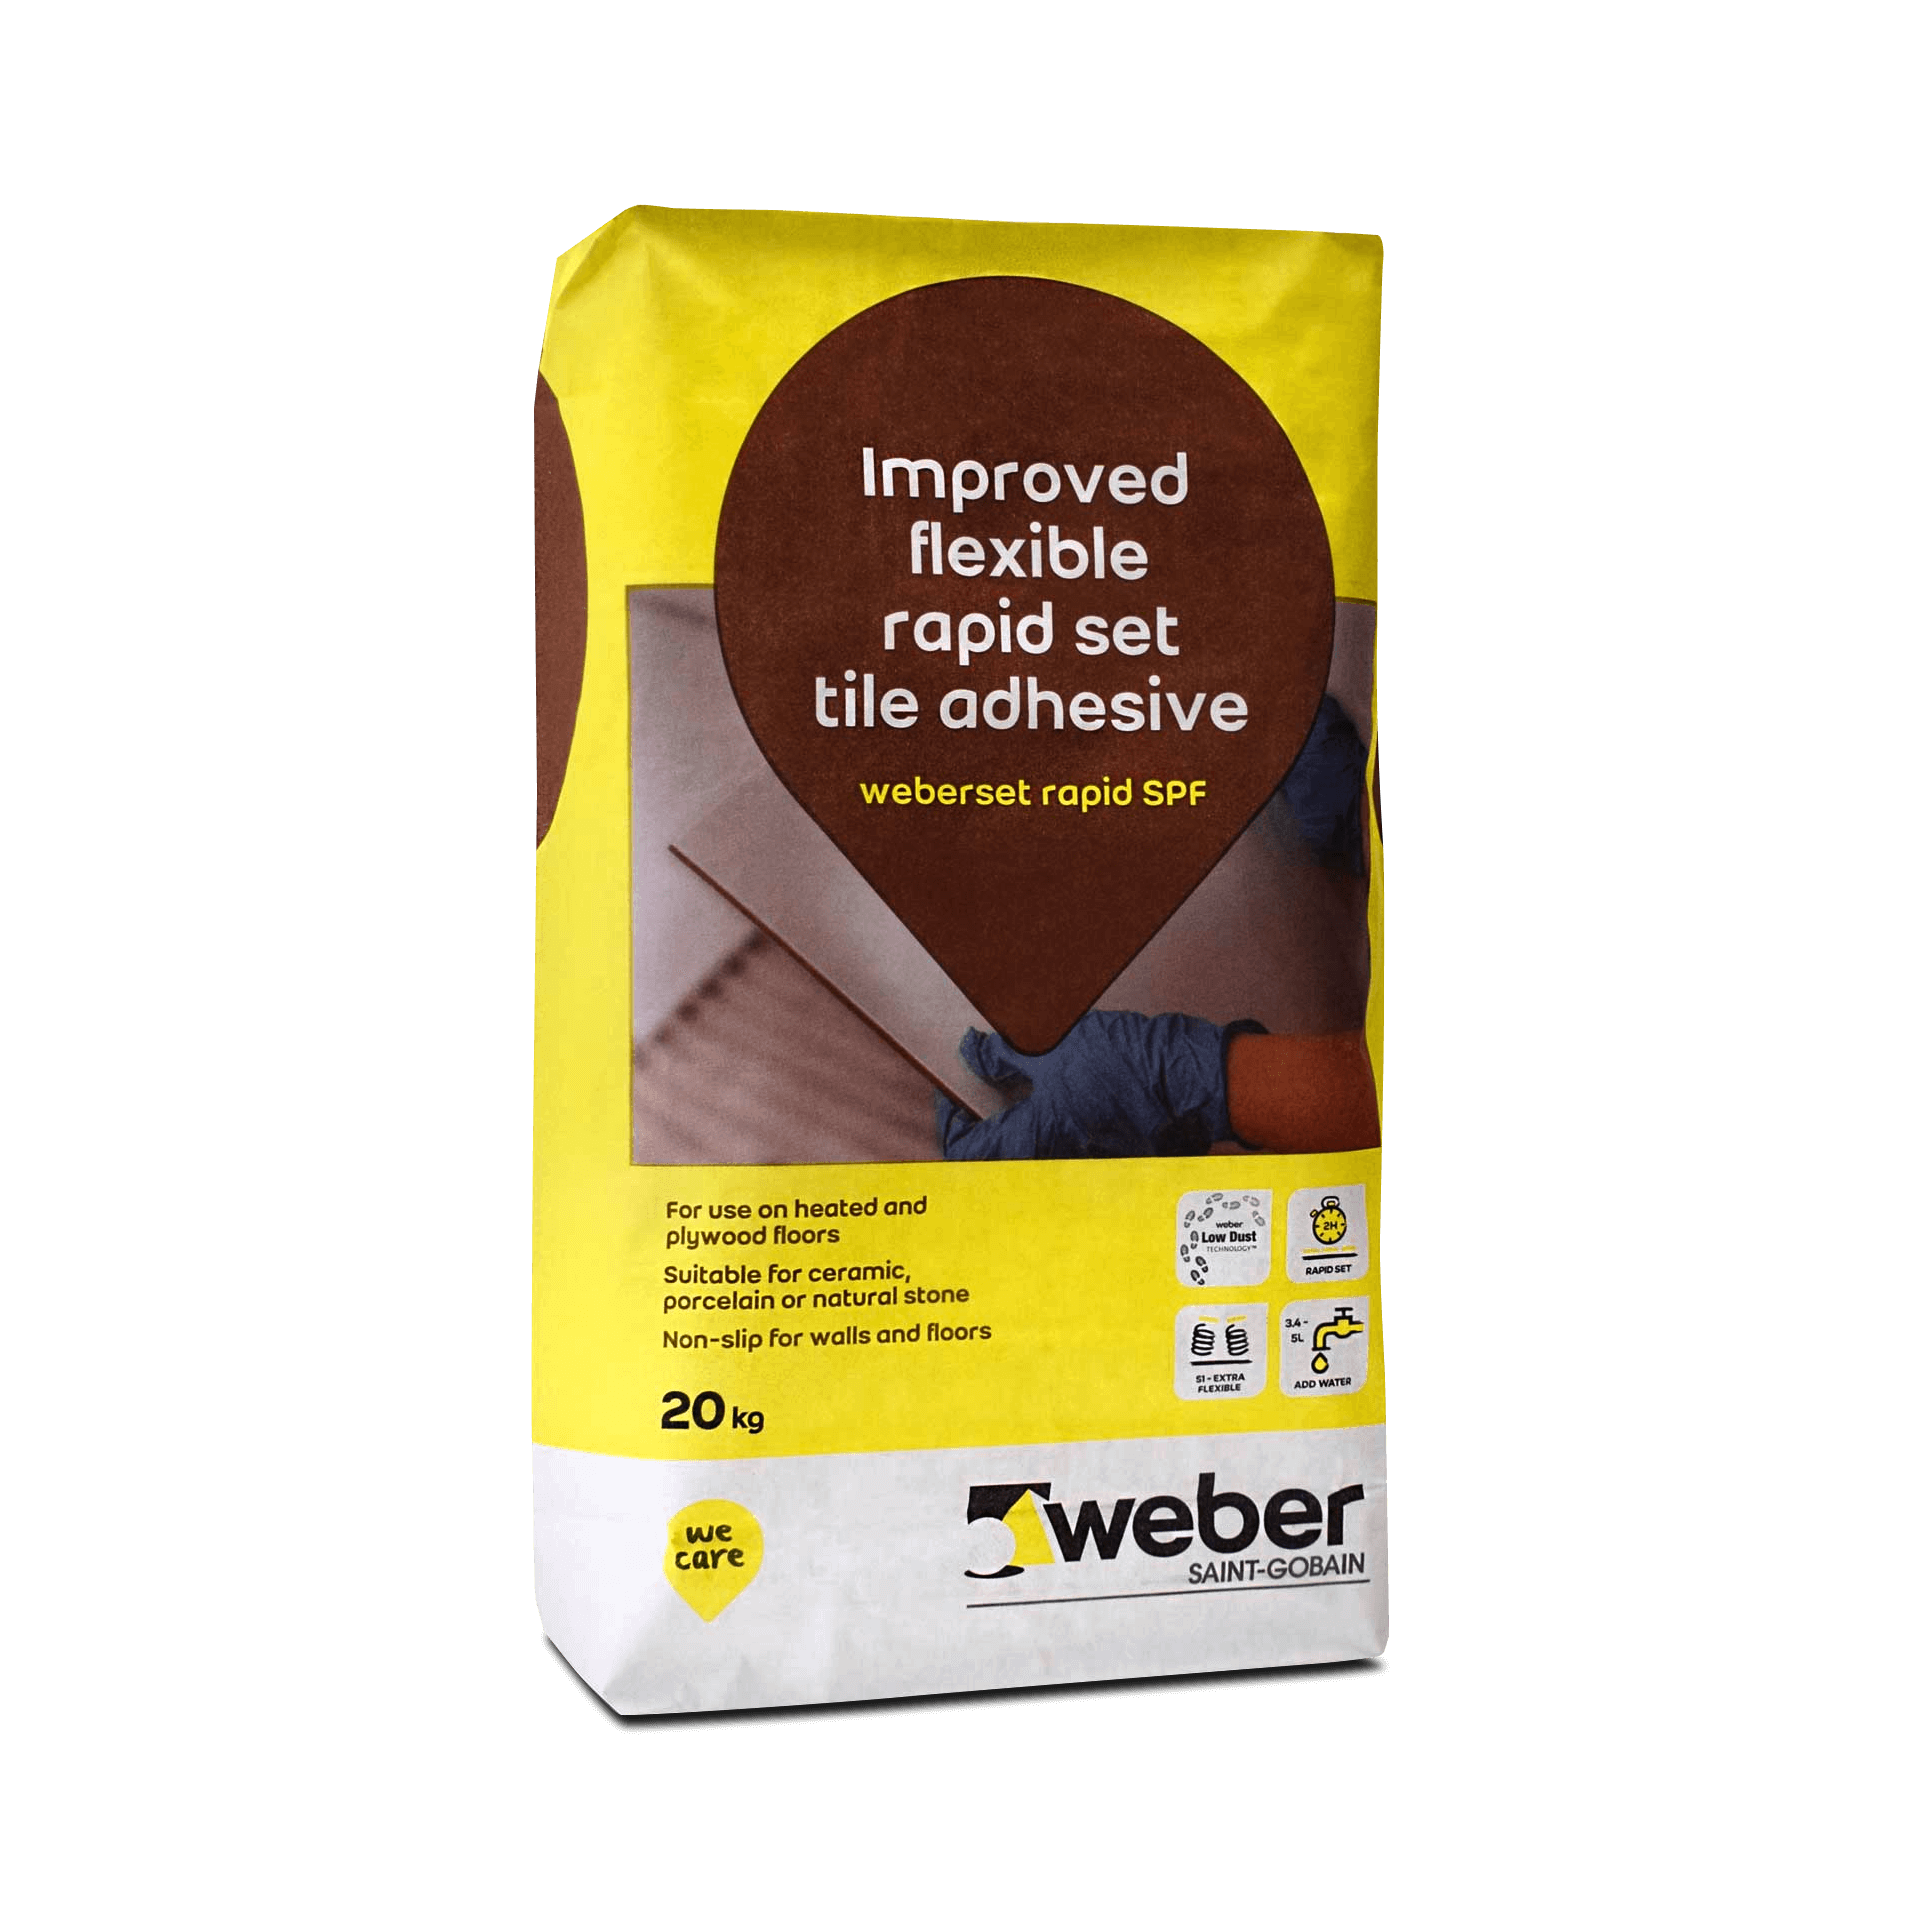
1. Using an adhesive suitable for fixing onto wooden substrates and following the adhesive manufacturers advice for any priming or surface preparation, apply the adhesive to the surface using a 4mm notched trowel. This should provide a bed of 4mm width x 2mm height ribbed adhesive. Take care to ensure that the adhesive bed is even, without excess in any depressions in the surface. Do not attempt to use the adhesive as a leveling compound. If too much adhesive is present, the result can be that the underside of the matting will become filled with adhesive and the product will not be able to function.
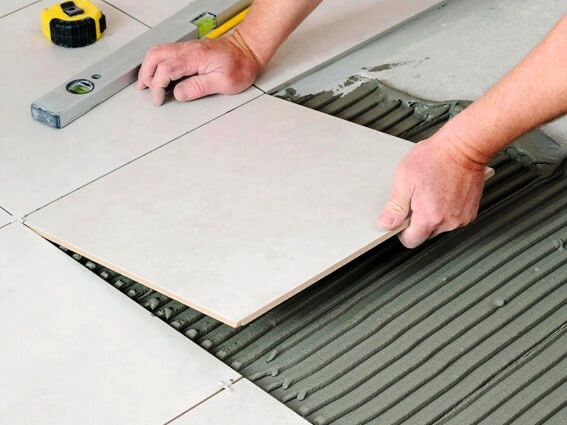
2. Using a flat grouting float press the matting firmly into the adhesive bed. Leaving a gap of approx 5mm at the perimeter between the matting and the wall/skirting.
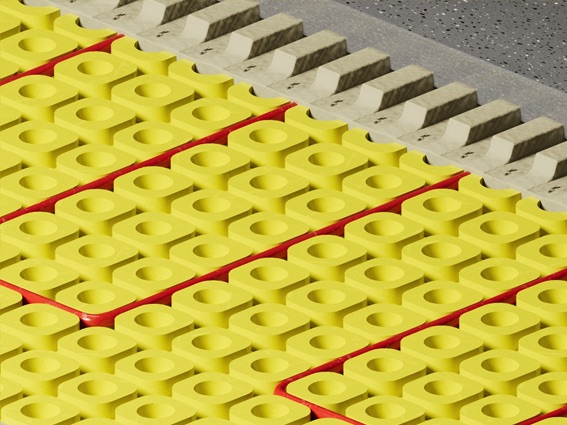
3. The aim should be to achieve good adhesion to the fixing webbing without filling the cavities in the matting.

Fixing the tiles
1. Follow the basic instructions for CI++ matting.
2. Use a flexible adhesive and grout.
We would advise that tiles below 20mm x 20mm should not be used with CI++ matting.
Because of the almost infinite variety of substrate, tile and adhesive / grout combinations it is impossible to provide an absolute guarantee of performance. A reasonable degree of care taken when fitting the product will ensure the best chance of the success enjoyed around the World by users of this product.
Note! If using Green or V313 Chipboard you need to contact the adhesive manufacturer and check if there are any special instructions for using adhesive on this type of chipboard.

Natural Stone products can be very weak.
It is advisable to use Durabase CI++ as part of this installation process to ensure any stress relief is not passed through to the stone surface

Preparation
1. The substrate must be sound and capable of withstanding the load to be carried without vertical movement.
2. The adhesive used to bond the CI++ matting to the surface must be capable of – a) bonding to the Galvanised surface and b) making a mechanical bond with the fleece on the underside of the CI++ matting.
Fixing the matting
1. Using an adhesive suitable for fixing onto the substrate and following the adhesive manufacturers advice for any priming or surface preparation, apply the adhesive to the surface using a 4mm notched trowel. This should provide a bed of 4mm width x 2mm height ribbed adhesive. Ensure that the adhesive bed is even, without excess in any depressions in the surface. Do not use the adhesive as a leveling compound. Too much adhesive can result in the underside of the matting becoming filled with adhesive and the product will not function.
2. Press matting firmly into the adhesive bed with a flat grouting float.
3. The aim should be to achieve good adhesion to the fixing webbing without filling the cavities in the underside of the membrane matting.
One of the prime purposes of CI++ matting is to absorb stress within tiled installations by absorbing lateral movements that occur in substrates. The decoupling action of the product is exceptionally effective in dealing with this type of movement, even for wooden substrates where the movement can be viewed as cyclical. Humidity and temperature can lead to repeated expansion and contraction of this difficult surface.
However where surfaces move vertically, CI++ matting offers no protection. This is best understood anecdotally. For example, a new extension to a building is undertaken where the tiled surface is required to run across both the old and new surface.
In these circumstances the existing floor will probably be well established and stable. The new floor in the extension could be subject to settlement or general movement. Whatever the base material used to form the substrate in both floors CI++ matting will absorb any stress caused by horizontal movement.
One of the prime purposes of CI++ matting is to absorb stress within tiled installations by absorbing lateral movements that occur in substrates. The decoupling action of the product is exceptionally effective in dealing with this type of movement, even for wooden substrates where the movement can be viewed as cyclical. Humidity and temperature can lead to repeated expansion and contraction of this difficult surface.
However where surfaces move vertically, CI++ matting offers no protection. This is best understood anecdotally. For example, a new extension to a building is undertaken where the tiled surface is required to run across both the old and new surface.
In these circumstances the existing floor will probably be well established and stable. The new floor in the extension could be subject to settlement or general movement. Whatever the base material used to form the substrate in both floors CI+ matting will absorb any stress caused by horizontal movement.
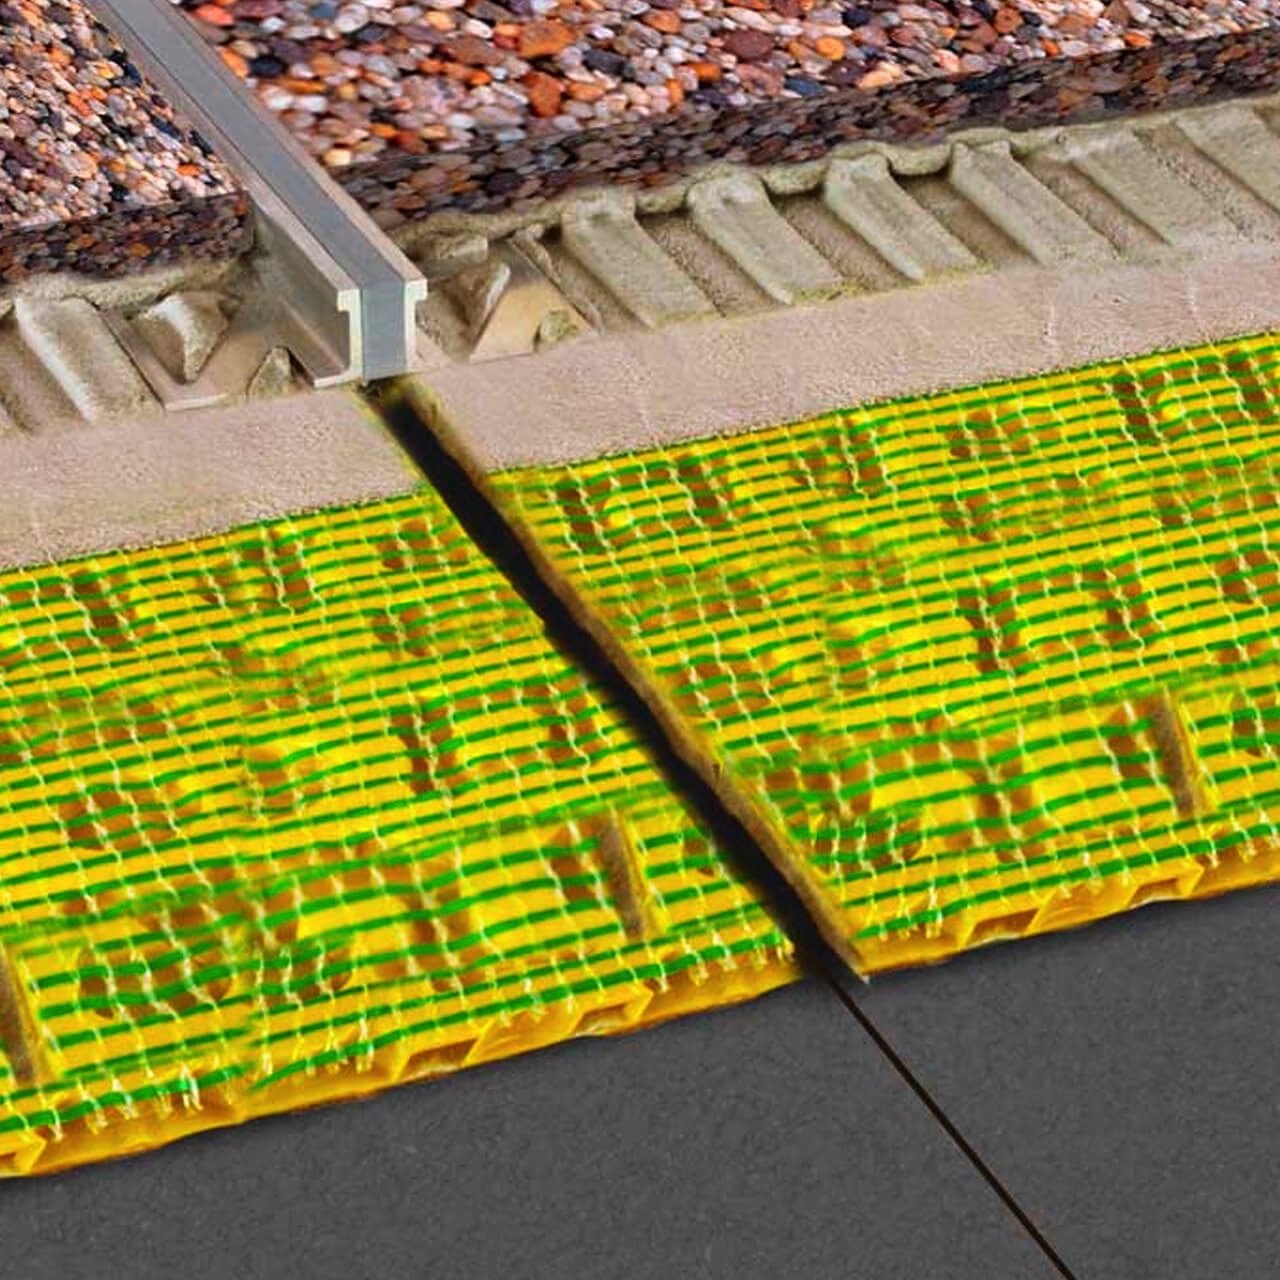
These guidelines would also apply if the tiled area covers any other substrate movement joints.
At these points CI++ matting should be split directly at the joint and a surface movement joint positioned directly in line above the subfloor / CI++ matting split.
If no subfloor joints exist, then intermediate joints should be fitted at no more than 10mtr x 10mtr field size in non-heated floors and in heated floors no more than 40sqm the longest length no longer than 8mtr.
Summary
CI++ Matting absorbs horizontal movement very effectively. It cannot absorb the vertical movement that occurs where separate sections of subfloor abut.
Tiled surfaces should not be viewed as waterproof. To protect walls and floors substrates from water penetration it is important to provide secondary protection in the form of a barrier between the underside of the tiles and substrate surface. This extra protection need only be provided in the area of exposure to water. The Dural Durabase system provides an easy to apply and cost effective way solution.
Walls – Durabase WP
In an average wet room it can be assumed that the area of maximum exposure to risk is in the immediate vicinity of the shower spray. Durabase WP should be applied to these areas. The membrane should be cut to size for the area allowing for an overlap on the seams of approx. 10cm.
An adhesive suitable for the substrate should be applied to the wall. (Hydraulic setting tile adhesive is ideal for this purpose). The adhesive should be applied using a 4mm x 4mm notched trowel. The membrane should then be pressed firmly into the adhesive bed. A plastering trowel or the flat side of a notched trowel is ideal for this purpose. Trapped air bubbles must be avoided.
The transition from wall to floor must be bridged with a strip of WP membrane at least 5cm wide on each surface, (an accessory tape is available for this purpose or off cuts can be utilised where possible). Tiling can commence immediately onto the surface of the membrane using standard methods and adhesives etc.
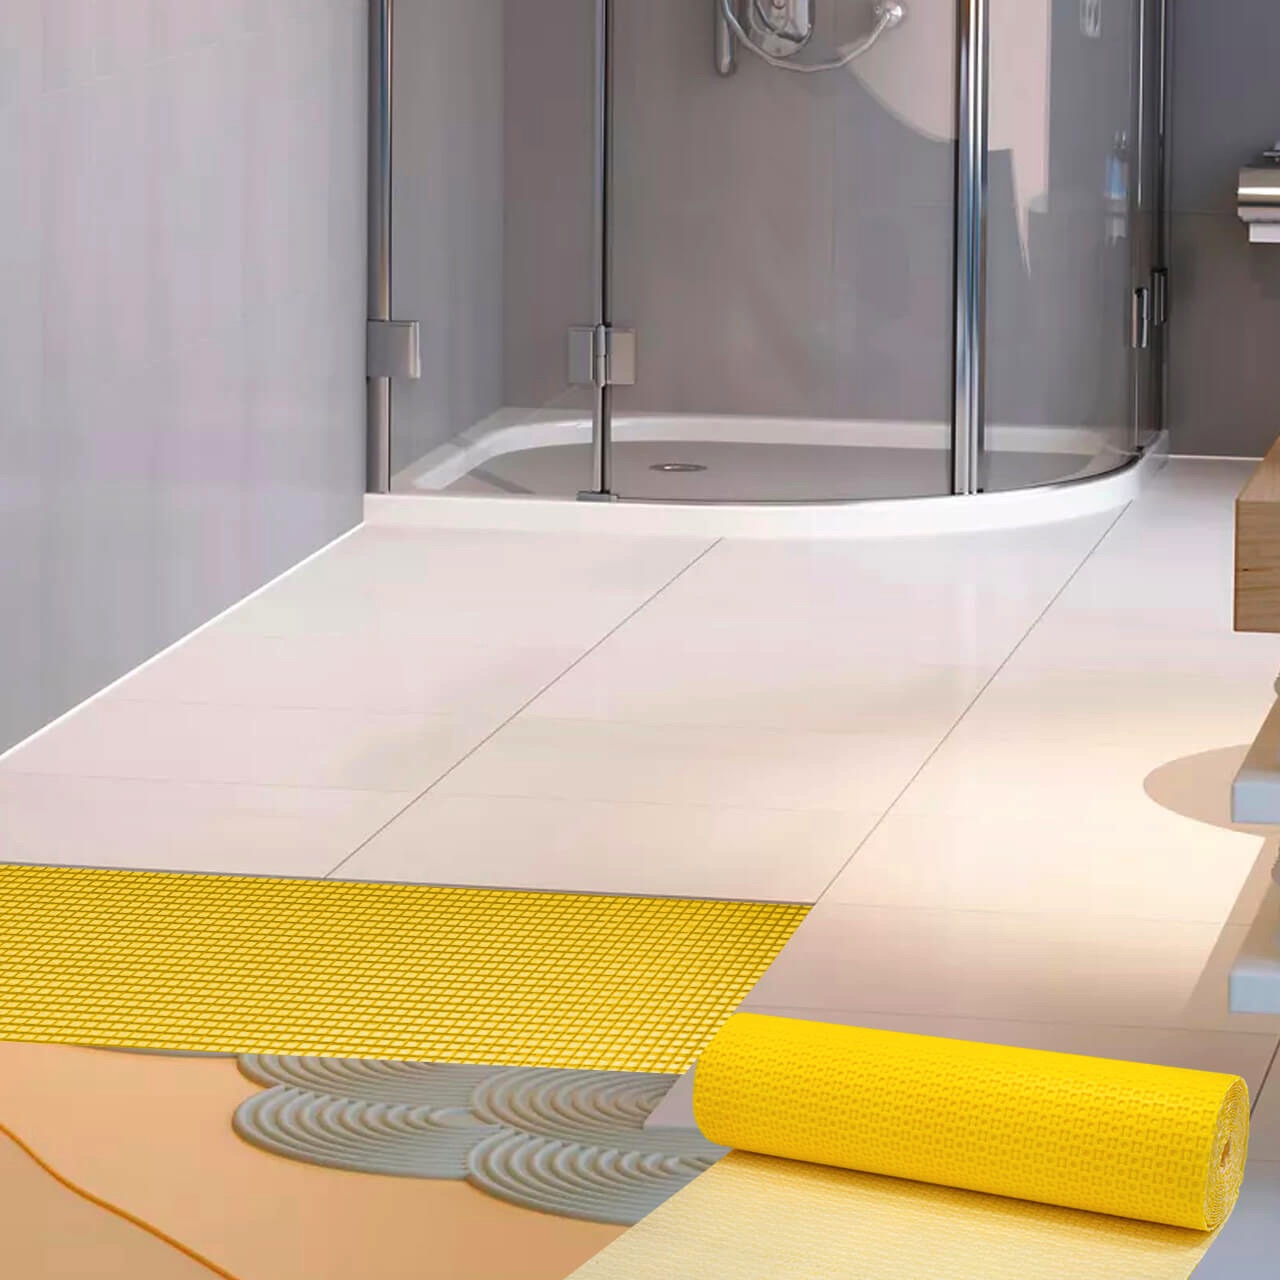
Floors – Durabase CI++
In a wet room Durabase CI++ membrane can provide a solution to two problems. It provides protection from moisture penetration. It also absorbs any movement in the substrate. This would typically be either wooden boards or screed materials laid so as to achieve the falls in the surface to drains etc. This combination of benefits makes this product very useful in wet room situations.
The membrane is laid into thin bed adhesive suitable for the substrate. In most cases this would be thin bed hydraulic setting tile adhesive. The sections are but jointed and the junction bridged with strips of WP matting as above. The junction of the wall and floor should also be bridged in the same manner. Where drains, pipes etc. must pass through the membrane these areas should be sealed with a “collar” made from WP matting. These are available as ready made items or can be produced from off cuts.
Once the “tanking” has been completed and provision for drainage allowed for, tiling can commence. This should follow the normal working method. Balcony projects are becoming more prevalent with house builders maximising space by using the outdoors, it is becoming common for the tiling in the inside to be carried through onto the balcony or the balcony be tiled in it’s own right. Fixing the matting Suggested Adhesive for use under the CI++ Matting Weber – Prime with PR360 then use a 2 part mix of Weber Set Plus powder adhesive and the additive AD250
Sealing MembranesDurabase WP Sealing Membrane
Thickness 1.5mm Width 1.00mtr.Durabase CI++ Movement Isolation and Sealing Membrane Thickness 3mm Width 1.00mtr.
AccessoriesSealing Strip for junctions and transitions.
Width 150mm.Sealing Strip for junctions and transitions.
Width 120mm.Pre formed Corners
Internal / External 140mm x 140mm.Pipe Collars
120mm x 120mm / 425mm x 425mmANHYDRITE SCREEDS
Tiling onto these substrate presents certain problems. These fall into two areas:
1. Residual Moisture within the screed.
2. A friable surface caused by loose material or laitance.
1. Residual moisture
Screeds of this type are very sensitive to moisture and must be “dry” before any floor covering can be fitted. BS 5385 Code of practice for ceramic tiling states this should be 0.5% moisture content or less. BS 8204 Code of practice for pumpable screeds states that the residual moisture in the screed should not exceed 75% RM.
It is therefore vital that the moisture content of the screed is checked and verified before any floor covering is laid. A failure to undertake this basic check will void the guarantee. It should be noted that any subsequent moisture penetration of the screed can cause damage as the screed can “soften” causing debonding.
2. Friable Surfaces
As this type of screed material cures it develops a smooth top layer. This is composed of loosely bonded particles that can appear to be solid and an ideal surface onto which to tile. Unfortunately it isn’t! It is weak and WILL break down causing debonding.
In order to fit CI++ matting onto this type of surface the following steps must be followed. This advice also applies to the direct fix of any Floor covering.
To obtain a satisfactory bond of the CI++ membrane to the screed surface a moisture test must be carried out that meets the standards described above. The “loose” surface of the screed must then be mechanically scraped or scabbled. The soft material will be removed fairly rapidly until the hard solid core is exposed. This surface must then be treated with a primer as recommended by the adhesive manufacturer. This primer serves to protect the gypsum in the screed from the cement in the adhesive, preventing the formation of Etrinite crystals, which cause tiles to debond.
Once the surface preparation is complete the CI++ matting is fixed in the normal method.
1. The Mat is cut to size and put on one side.
2. A thin layer of cementacious tile adhesive is spread over the surface and the Mat is pressed firmly into place. Subsequent strips / pieces are laid abutting each other. Sealing tape being used if there is any danger of water penetration of the installation.
3. Tiling can take place immediately using a notched trowel suitable for achieving solid bedding of the specific tile.
The installation should be completed using a flexible grout.
ASPHALT
In renovation projects, the balcony area usually has an Asphalt surface which cannot be tiled directly onto due to the high level of movement anticipated – it would cause the tiles to “tent” or become loose from the Asphalt. CI++ matting can be adhered to Asphalt, using the correct primer and adhesive – contact your adhesive manufacturer for recommendations.
Preparation
1. The substrate must be sound and capable of withstanding the load to be carried without vertical movement.
2. The adhesive used to bond the CI++ matting to the surface must be capable of bonding to the Asphalt and making a mechanical bond with the fleece on the underside of the CI++ matting.
1. Use an adhesive suitable for fixing onto the substrate and follow the manufacturers advice for any priming or surface preparation. Apply the adhesive using a 4mm notched trowel. This provides a bed of 4mm width x 2mm height ribbed adhesive. Ensure the adhesive bed is even, without excess in any depressions in the surface. Do not use the adhesive as a leveling compound - the underside of the matting becoming filled with adhesive and the product will not function.
2. Press the matting firmly into the adhesive with a flat grouting float.
3. The aim should be to achieve good adhesion to the fixing webbing without filling the cavities in the underside of the membrane matting.
Fixing the tiles*
1. Follow the basic instructions for CI++ matting
2. Use a flexible adhesive and grout
*Tiles below 20mm x 20mm should not be used with CI++ matting.
Due to the almost infinite variety of substrate, tile and adhesive/grout combinations it is impossible to guarantee performance. Care should be taken when fitting the product to ensure the best results.